There’s no denying that every business is on the quest to make more revenue. Be it a SaaS, E-commerce, Lead Generation, or any other model.
This is not a bad thing, but to get more revenue, there are two things involved.
You need to get more qualified traffic or make more money from your existing traffic.
A/B testing, also known as split testing, helps you with the latter by giving you tools that help you optimize your existing content and pages which will improve your conversion rates, and unlock more revenue opportunities from your current traffic.
For many businesses, the idea of conducting an A/B test sounds scary and technical, which should not be the case.
In this article, we’ll look at A/B testing, how A/B testing works, why you should consider A/B testing, and categories of A/B testing, and I’ll walk you through platforms and plugins step-by-step on how to carry out your first test.
Ready? Let’s get started.
What is A/B Testing?
A/B testing, also known as split testing is the process of pithing one or more new designs with a changed variable against an existing design known as the control to see which one has more conversions.
Both designs (the new and the control) are shown to website visitors to track which one performs better.
Effective A/B testing helps you make data-informed decisions that ultimately impact your sales which reflects in your revenue and profit.
How Does A/B Testing Work?
Here are different scenarios for you to consider.
On your homepage page, let’s say you want to change the copy on your CTA button, and you’ve got two ideas appealing to you; ‘Order Now, and ‘Buy Now.’

With an A/B test, you don’t need to guess. You create a variation of your home page with one of the copy ideas for the CTA button; then you drive traffic to both pages; the result after a couple of weeks, the result will let you know which call to action drives more clicks.
A different example is a website with high cart abandonment rate issues.
There are several reasons why this could be, but let’s assume in the research stage, we uncovered users have an issue with the checkout stage. Instead of redesigning the entire checkout process, an A/B test could provide more clarity.
A page is designed with lesser checkout steps, and the original design is left as the control, then an equal number of traffic is driven to both checkout steps.
If the variation with fewer checkout steps saw more orders successfully placed, we have a winner. If the case is different, that both pages (variation and control) performed poorly, other factors are at play here.
This leads to more research, hypothesis, and new A/B tests.
These examples are just a condensed version of how A/B testing works.
Why You Should Consider A/B Testing.
The goal of every business is more revenue, increasing customer satisfaction while getting more of your target customers to come to your website.
But this isn’t always the case for many businesses. For some websites, they get a lot of traffic but minimal conversions. Other websites suffer from high bounce rates from priority pages such as product pages, category pages, etc.
These and many more are the issues plaguing websites. To reduce the possibility of these issues (high bounce rates, high cart abandonment) happening on your website, here are some reasons to consider A/B testing.
1. To decrease website bounce rates:
Suppose your website visitors bounce often; this action signals search engines like Google that your website content is not helpful, and your page rankings drop.
With A/B testing, you can find out which variation of your priority pages makes more of your website visitors stay on your website than bounce away.
This will lead to more interaction with your website, which leads to your content ranking.
2. To increase conversion rate:
An increase in micro and macro conversion means more revenue for your website.
Conducting an A/B test to see which site elements help improve your conversion rate will do your business good. You can run tests on your product pages to drive more add-to-carts and orders placed.
3. Redesign of your website and specific pages:
Now and then, websites undergo a redesign to make them visually appealing.
Making changes to your website design through guesswork is a great way to tank your conversion rates.
Running page variation tests to see which design appeals more to your visitors is the logical way.
Using this A/B test method, there’s no fear in drastically reducing your conversion rates.
4. Usability tests (to improve user experience):
Many of the frustrations users have with websites is that they don’t seem to find what they’re looking for.
In simple terms, it’s hard to move around, and the website doesn’t function as it should.
Conducting A/B tests help you find out which variation reduces user frustration and improves user experience on your website.
Categories of A/B Test You Can Carry Out On WordPress.
Suppose you’ve typed this term types of A/B tests you can carry out on WordPress on Google; you’ll be bombarded with articles that prescribe different types of tests ranging from button color tests, copy tests, design tests, etc.
There’s absolutely nothing wrong with these tests, they are valid tests, but not every test has the same impact on a site’s conversion rate.
From the work we’ve done for clients here at Invesp, we’ve identified categories of A/B tests that cover the known A/B tests and unpopular tests.
1. Element Level testing:
This is the first level of A/B tests, and it’s the easiest. You can test a headline against a variation, a different button copy or color, etc.
Element level testing requires the least effort, it’s the easiest to implement, and it has the most negligible impact on your bottom line most of the time.
2. Page-level testing:
This is a step harder than element-level testing. You’re removing things from the page; you move things around, introduce new things on the page, etc. You’ll want to spend 60 – 70% of your time here because it can get more complex.
3. Visitors flow testing:
This is one of the more complex tests to carry out. When conducting this A/B test, you want to change how a visitor navigates through your WordPress site e.g, a single-step checkout vs. a multiple-step checkout. Getting a winner here can significantly impact your bottom line.
4. Messaging:
This is an interesting test because it could span multiple elements and pages on your website. The hard work in this type of A/B test is not the actual A/B test but figuring out the messaging and making sure it’s consistent and there’s no disconnect between the pages and elements.
5. Element emphasis:
This A/B test seeks to answer the question of how often you want to emphasize an element. Questions like do I need to show this element once? When do I have to show this element? etc. This A/B test also requires some thinking.
How To Perform A/B Testing On WordPress.
To perform an A/B test on your WordPress website, you need a Google Analytics account and an A/B testing platform.
The reason for Google analytics is because;
1. You can add more goals in custom reports on Google analytics and track them. Most A/B testing platforms are limited in their flexibility to add additional goals and track them.
2.. GA already hosts much of the data concerning your user behavior, and you can use it to validate the data you get from your A/B testing platform.
3. You can dive deeper into the reported data from your A/B testing platform, e.g, if a variation had more revenue per user, you can look closely at metrics like average cart value or average quantity to find out why.
4. You can create a segment for each test variation and see how different audiences interact and respond to different test variations.
When choosing an A/B testing platform, dozens of small businesses prefer using Google Optimize at first because it has a free version.
This free version is limited because it allows you to run only five experiments simultaneously.
I’ll look at the free version of the Optimize tool later, but in this section, I’ll be touching on a different tool, Figpii.
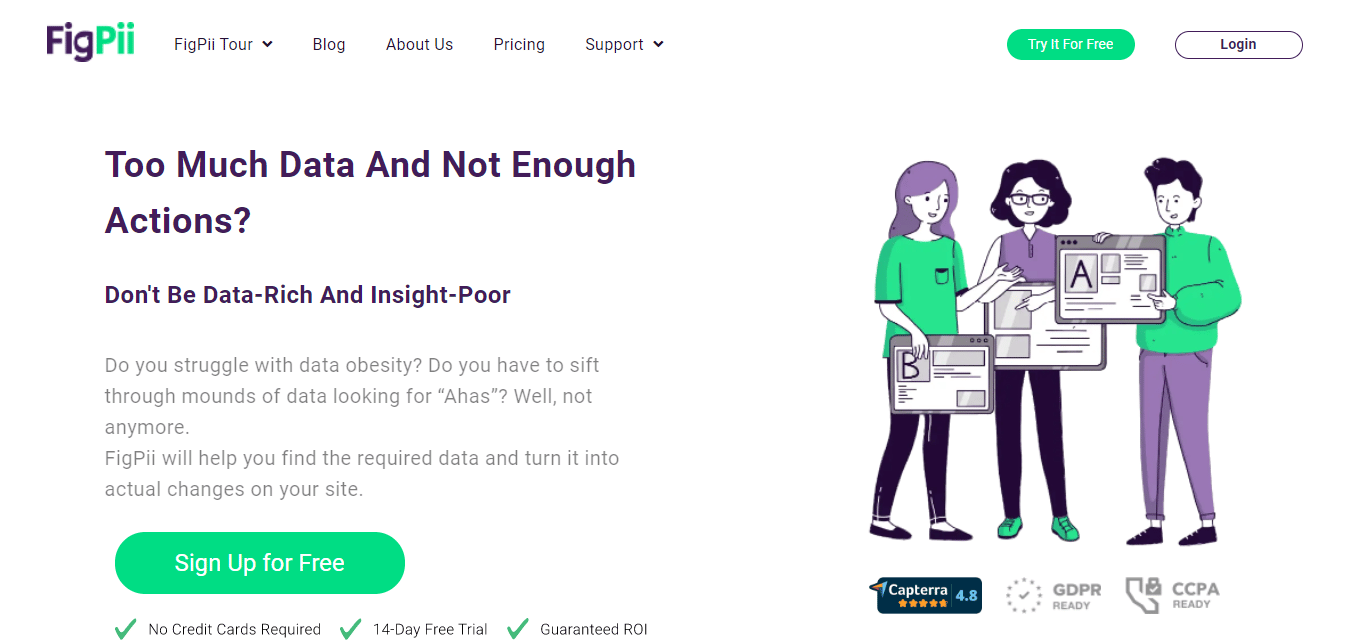
Figpii is an A/B testing platform that helps you better understand customer and user behavior by running A/B tests, viewing heatmaps and session recordings, and conducting polls and surveys.
The reason for choosing Figpii when there are a lot of A/B testing platforms out there is because;
1. It has a 14-day free trial period on all the plans. You don’t sign up with your credit card, no restrictions on the number of experiments you can run, or traffic size, unlike other tools that don’t have a free period, or if they do, it’s limited.
2. Figpii was developed by conversion optimization experts with over 16 years of experience.
3. Minimal validity threats to your A/B tests, unlike other tools that are prone to flicker effect and other validity threats.
To be able to conduct an A/B test on your WordPress website, the first step is to connect your website to Figpii.
How To Connect WordPress To An A/B Testing Tool
1. Sign up on Figpii by clicking sign up for free and entering your email address.
2. Enter your name and work email address.
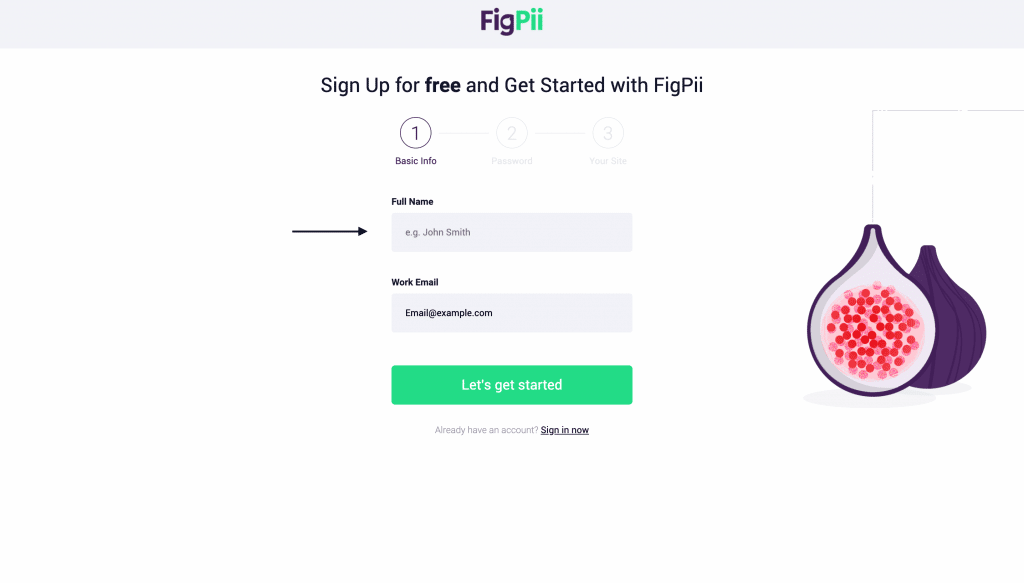
3. Choose a password that has a minimum of 6 characters in length.
4. Fill in your website address.
5. In the next stage, a screen will show you 3 ways to install Figpii’s tracking code to popular platforms (WordPress, unbounce, etc.)
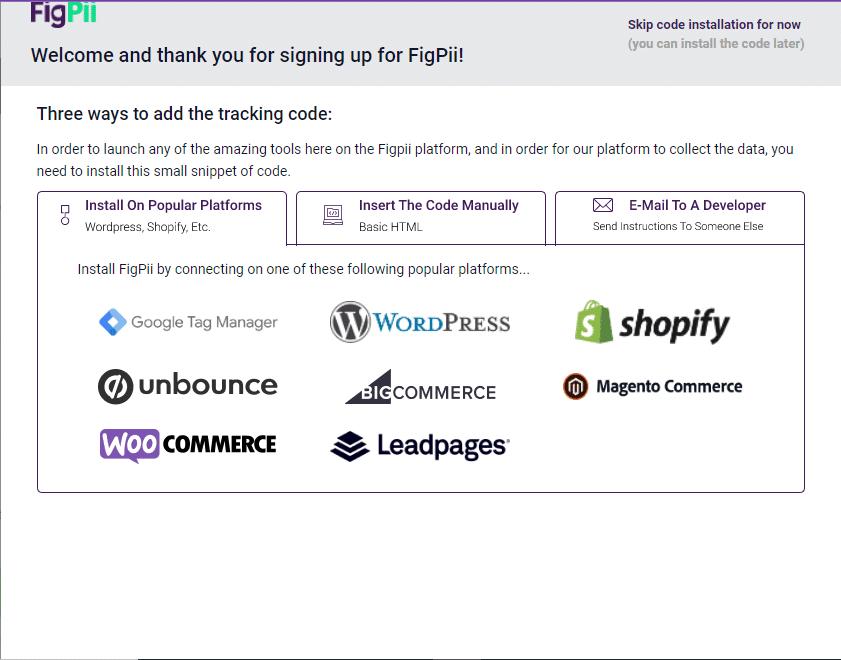
6. The recommended step is to use the Figpii plugin, which makes it very easy for you.
7. Switch to your WordPress dashboard, go to your plugin section, click on ‘Add New,’ and search for Figpii.

8. Click install when you see the plugin bearing the Figpii logo. After some seconds, you should see the activate button; click on that.

9. Look for Figpii on your side menu and click on it to access the plugin. Within the plugin, you’ll see visit your Figpii dashboard and get your access key.
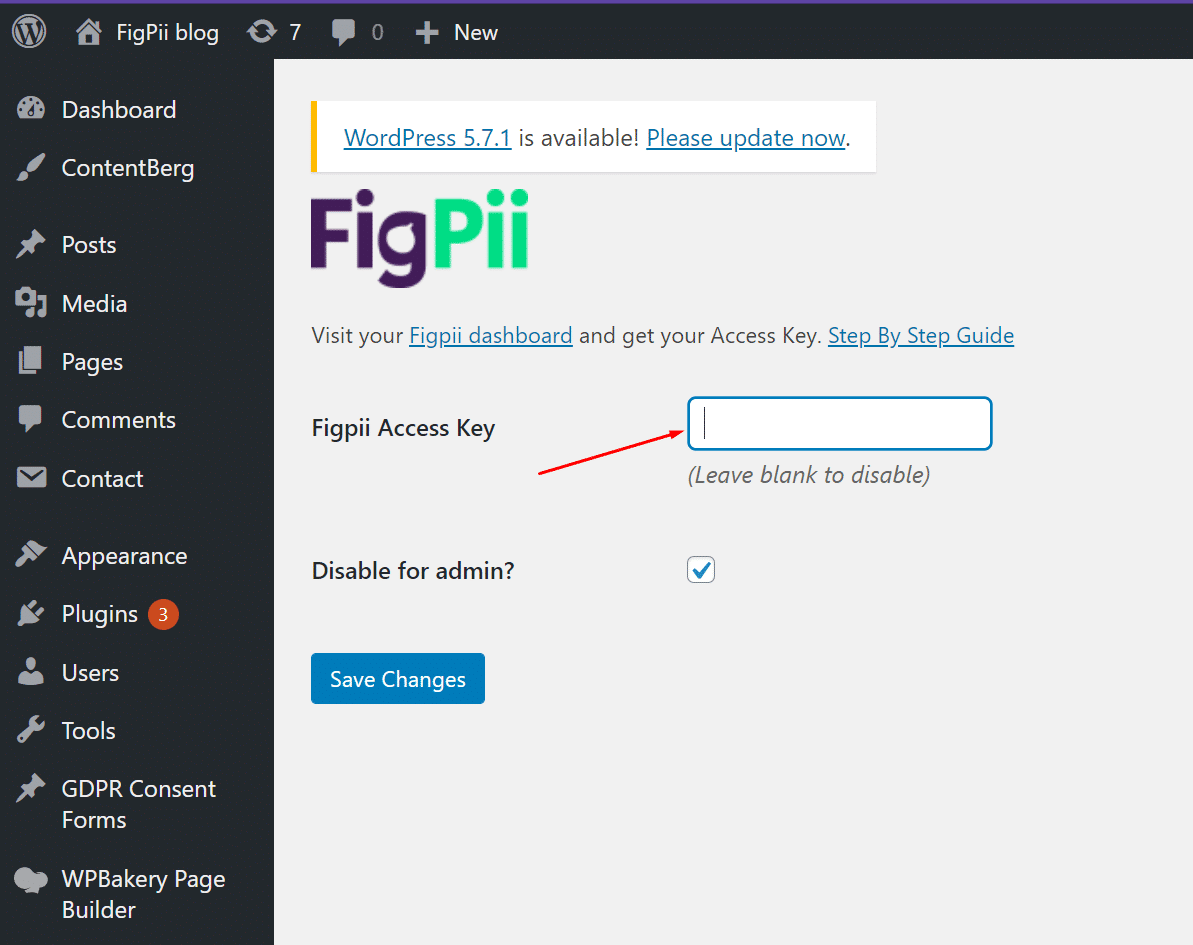
10. Paste your access key within the Figpii access box in the plugin and click on save settings.
11. Give the Figpii platform a while to direct your activation.
The next step is to connect your WordPress website to Google Analytics.
Link Your WordPress Site To Google Analytics:
First of all, if your website is already linked to GA, skip this point. If not, keep reading.
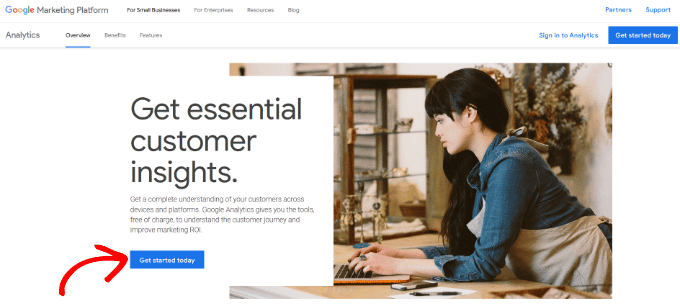
- You need to visit the Google Analytics website to sign up; when you’re there, click on the ‘Get Started Today’ button.
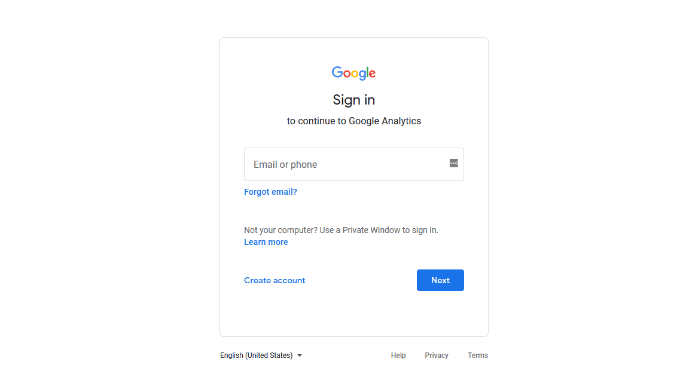
In the next step, you’ll be asked to log in to your Google account. If you already have a Gmail account, you can sign in with that; if not, you can create an account for yourself.
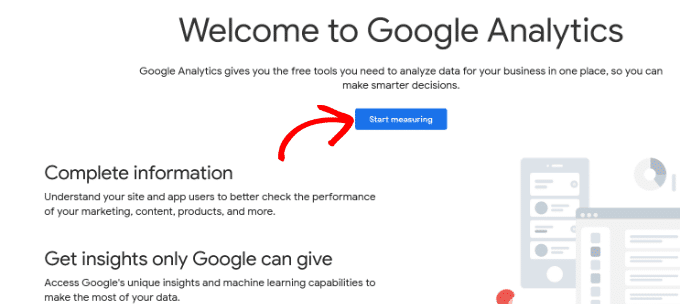
- After signing in, you’ll see a welcome screen like the one below; click on the button that says ‘Start measuring.’
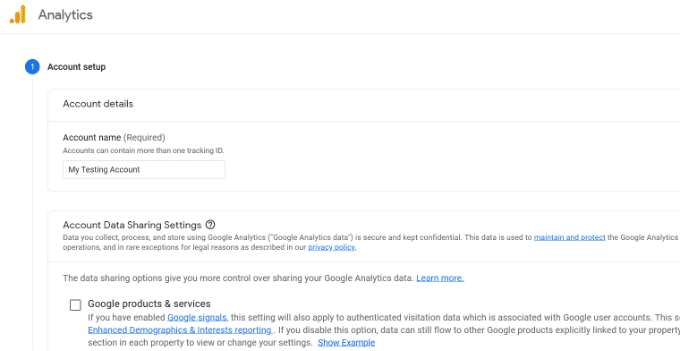
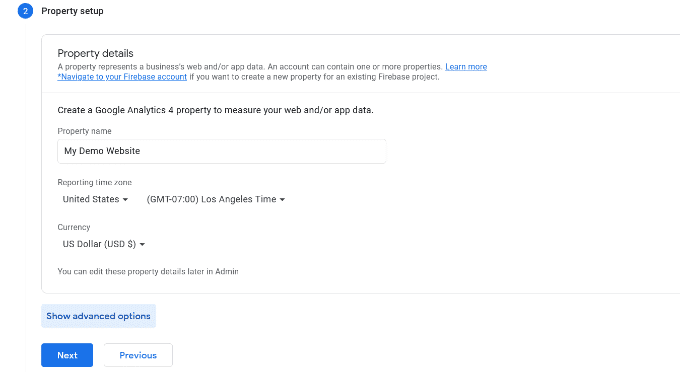
You’ll be asked to provide an account name. It’s best to use the name of your website. Google Analytics will show you multiple data sharing options; you can modify them or keep them.
- On the next screen, you’ll see a screen prompting you to create a Google Analytics property.
Google recently introduced Analytics 4 and plans to sunset UA (universal analytics) on the 1st of July 2023. Setting up GA4 now means you get new features, metrics, and an interface for your reports.
So, you go ahead, select your property name, reporting time zone, and currency, and click Next.
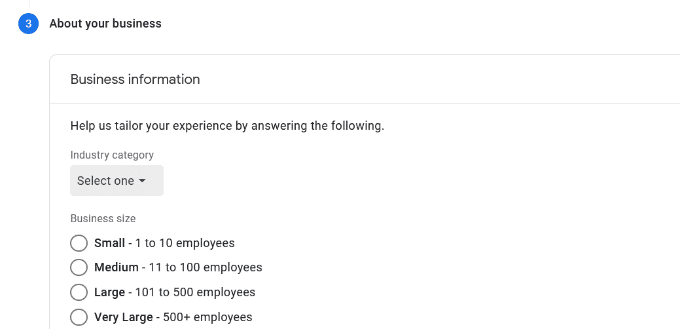
- On this new screen, you get to select your industry category, business size, and what you intend to use Google analytics for, or you could skip all these.

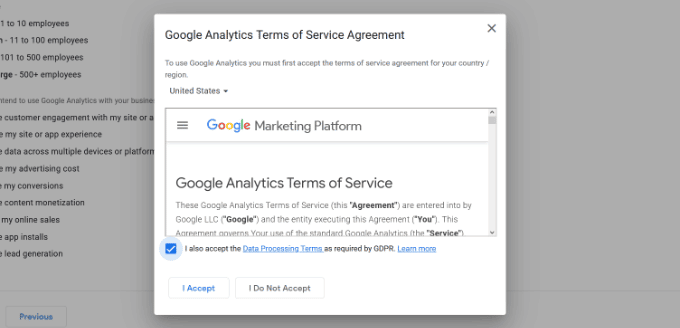
Once you click the create button, a popup window will appear with the Google Analytics terms of service agreement. Click on the checkbox.
Next, you’ll see a pop-up window with options for the messaging you’ll like to receive, simply check the one that interests you and click the save button.
- In this next step, you’ll see a screen with different stream options (web, android app, iOS app).
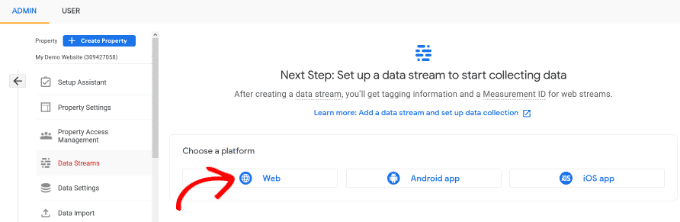
Click on the web stream, and enter your URL and stream name. Now you can click the create stream button.
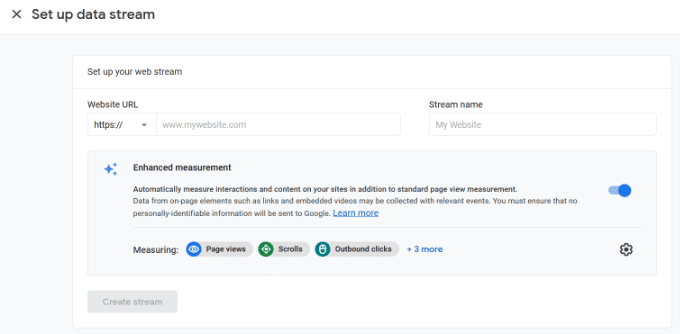
You can now see your Stream URL, name, and measurement ID.
Google Analytics will show you different ways to add GA to your WordPress site via tagging instructions section.
I suggest you leave this tab open as you head to your website to add Google Analytics using Monster Insight.
How To Use MonsterInsights Plugin To Connect Google Analytics To Your Website.
With over 3 million active installs, monsterinsights is WordPress’s most popular Google Analytics plugin.
With monsterinsights, there’s no need to hire a developer. You can enable all advanced Google analytics tracking features with a few clicks.
1. Go to the monsterinsght website, the pricing section, and choose the one you’re comfortable with. Once your license is active, download the plugin zip file.
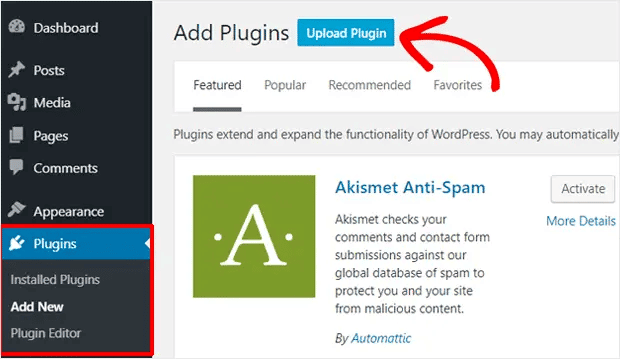
2. Head to your WordPress dashboard, go to plugins, click on Add new and the upload option, then upload the zip file you just downloaded.
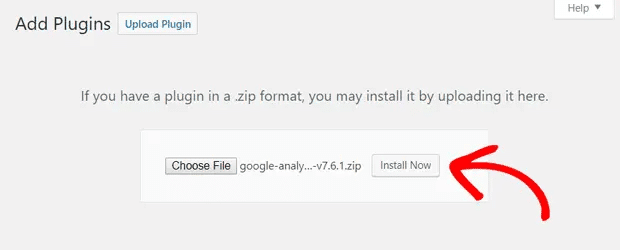
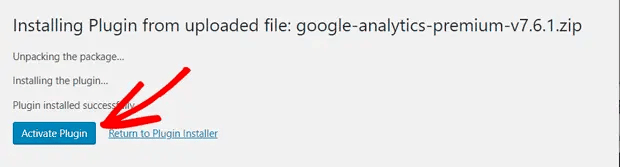
3. Once uploaded and installed, you can click on activate.
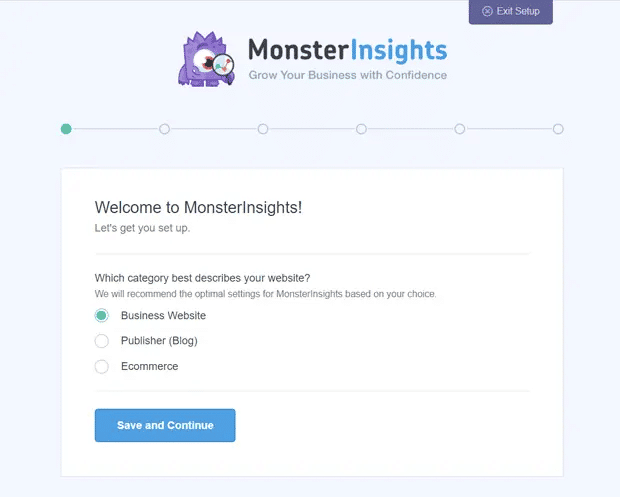
4. After activation, the plugin wizard will open up to guide you through the steps to take. The next step is to choose the category of your business. Choose and click the save and continue button.
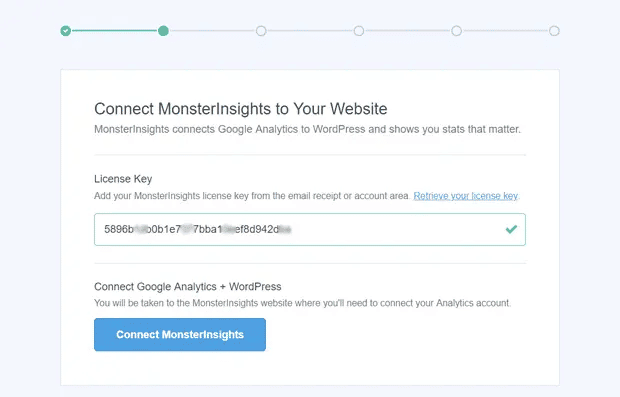
5. The next step is to connect your monsterinsight to your Google Analytics account. Here, you’ll provide the license key to monsterinsight, which you can find in your email or account area of the plugin website.
6. Once you input your website, it’ll be verified, and you’ll see an option to connect to Google Analytics.
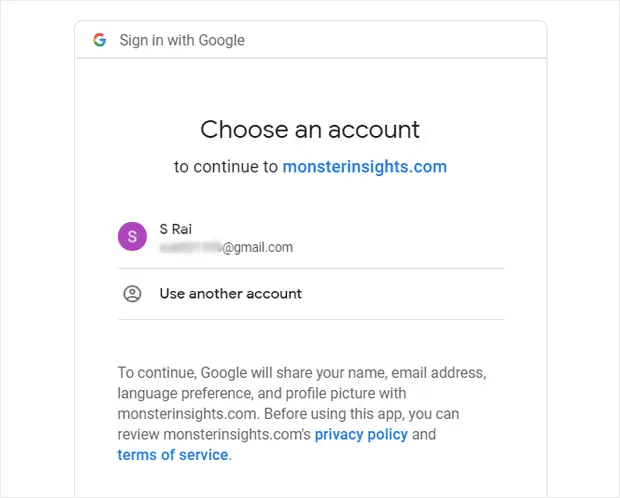
7. Select the Google account where you created the analytics for your website and click on continue.
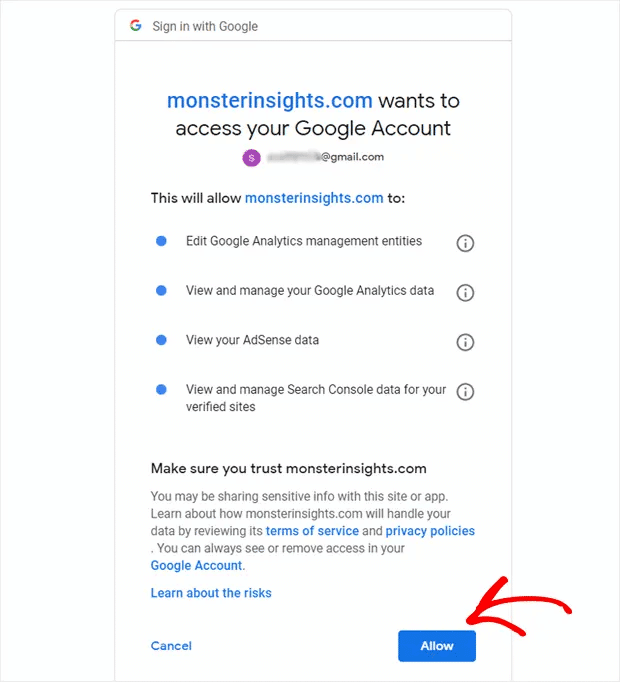
8. Next, you’ll need to allow monsterinsights the proper permission; this is important to get data feedback from GA.
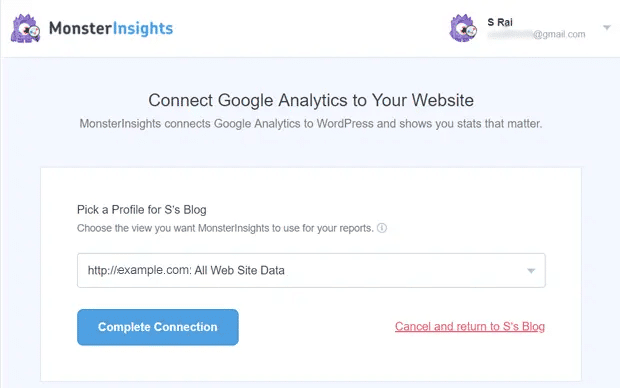
9. The final step is to pick a profile (website) to complete the connection. If you’ve got multiple profiles on your GA account, select the one you want to connect to monsterinsight and click on the complete connection.
10. You’ll be taken to the monsterinsights set up page where you’ll see recommended settings for Google Analytics. Review every setting and configure them and click on the save and continue button at the end.
Now you’ve installed and activated Figpii on your WordPress website, Google analytics, and monsterinsights to get GA data on your WordPress site.
The next step is to connect Figpii to Google Analytics so you can send experiment data to Google Analytics. Use the highlighted link on sending experiment data to Google Analytics to see how it’s done.
It’s time to run your A/B test.
How To Run A WordPress A/B Test On Figpii.
1. log in to your Figpii account.
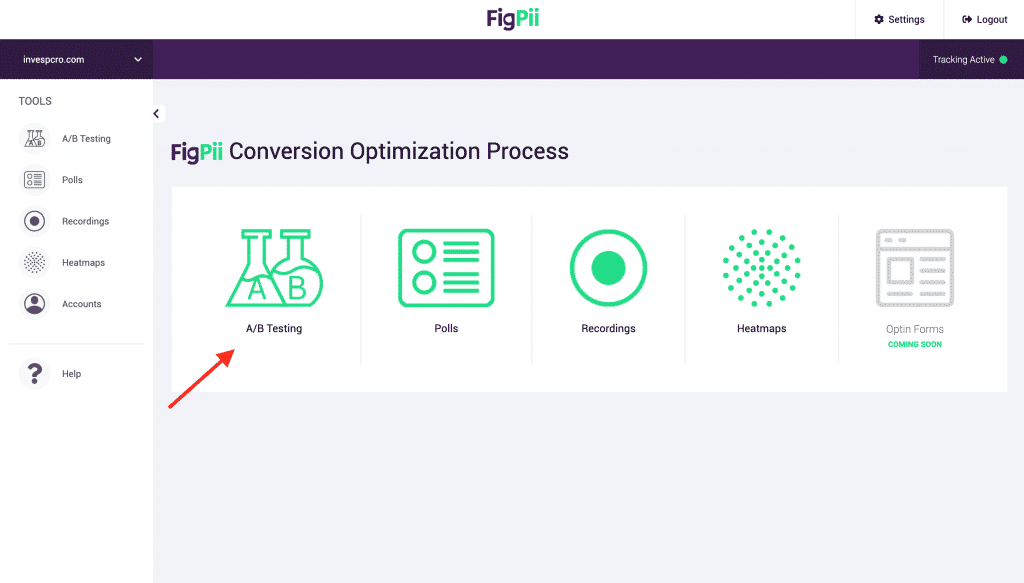
2. You can access the A/B testing option via your account homepage or the left menu.
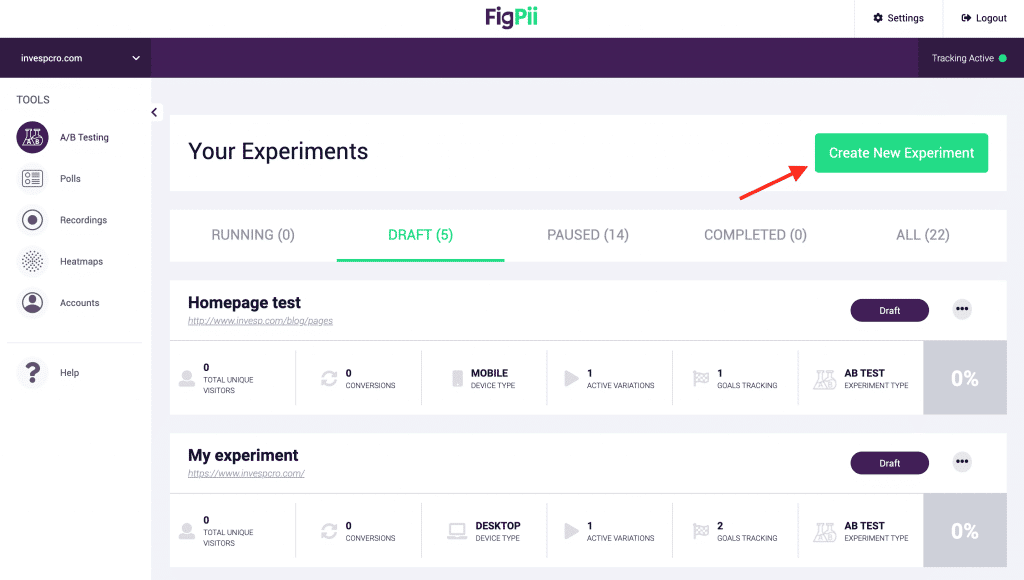
3. From your A/B testing dashboard, click on create a new experiment.
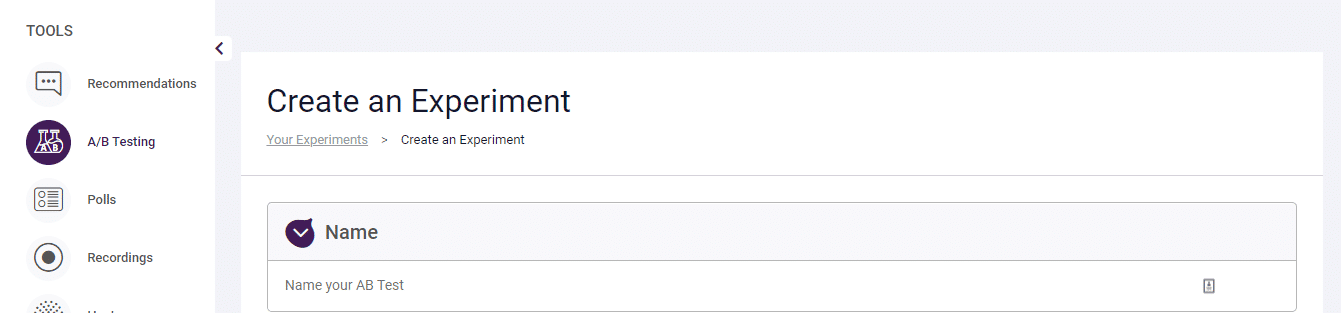
4. The next step is to name the experiment and choose the pages that your experiment will target from the page targeting.
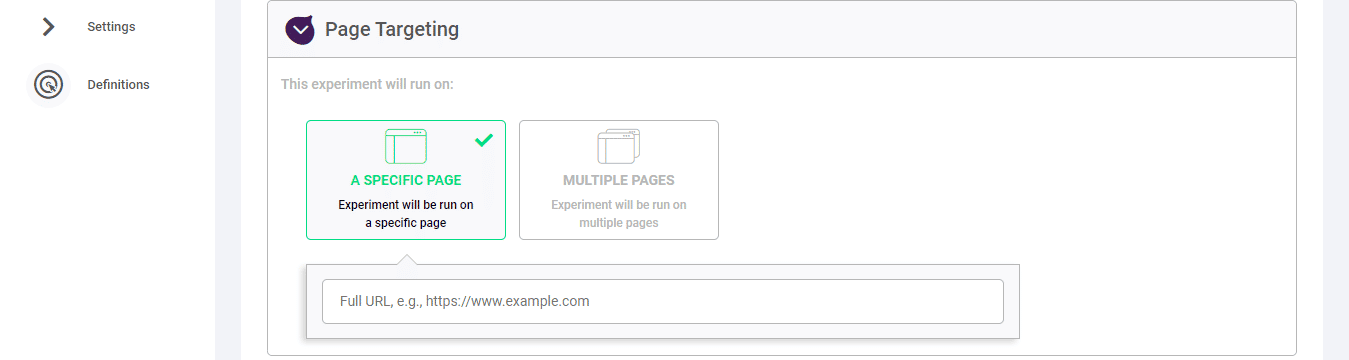
5. Under the type of experiment section, choose if your experiment will be an A/B test or split-URL test.

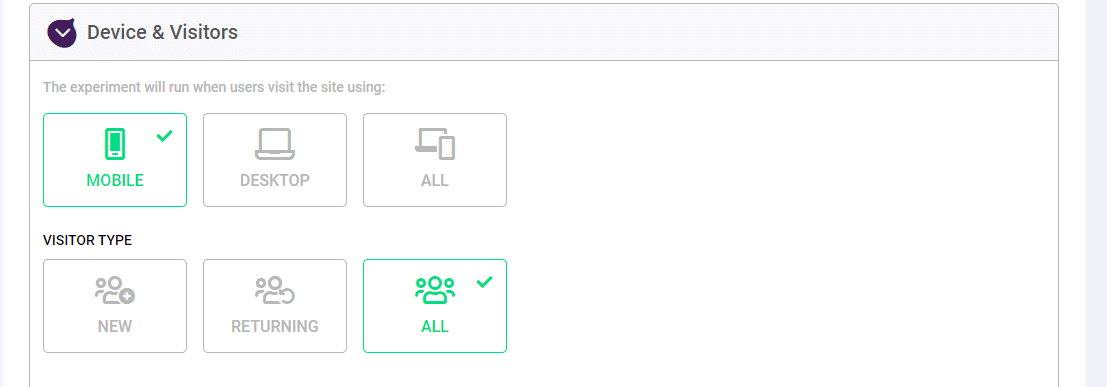
6. Now choose if your device will target desktop, mobile, or all devices and the type of visitors too.
7. When you click on next, you’ll be redirected to the Figpii editor, where you can design your variation. If you wish to make additional changes to the javascript, hover over the desired variation, choose add CSS/JS and click on ok.
8. Click on the next step when you’re satisfied with your design variations.
9. Choose your experiment variation weight and your experiment goals.
10. Launch your experiment by clicking on save and launch experiment.
11. On the right-hand side, click on the ellipsis section close to the button ‘Running,’ you’ll see reports, click on that to get an overview of the reports.
12. It’ll take some hours before Google will push data from analytics to Figpii, so don’t worry thinking your experiment is broken.
13. When you’re satisfied with how long your test has run, end it, and Google will stop pushing data from analytics to Figpii.
Other WordPress A/B Testing Tools
This section will consider other A/B testing platforms and paid and free plugins you can use to run A/B tests on your website or landing page.
1. Google Optimize:
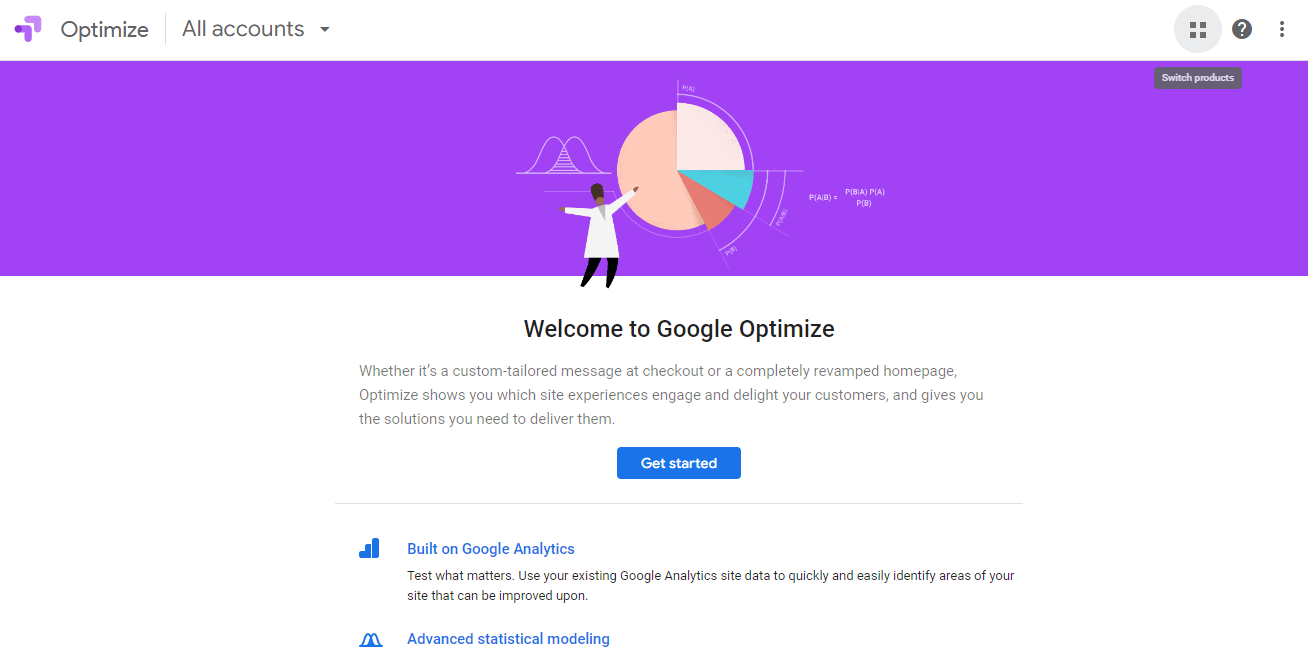
Previously known as Google content experiments, this platform allows you to run A/B and multivariate tests. Now integrated with Google analytics, it’s perfect for testing and gathering data.
It features a data log, experiments schedule, and a responsive visual editor.
There’s a free and paid version.
PROS.
1. Google analytics integration.
2. The free version offers a lot.
3. It’s flexible.
CONS
1. It’s hard to navigate if you’re unfamiliar with the technology.
2. Visual website optimizer:
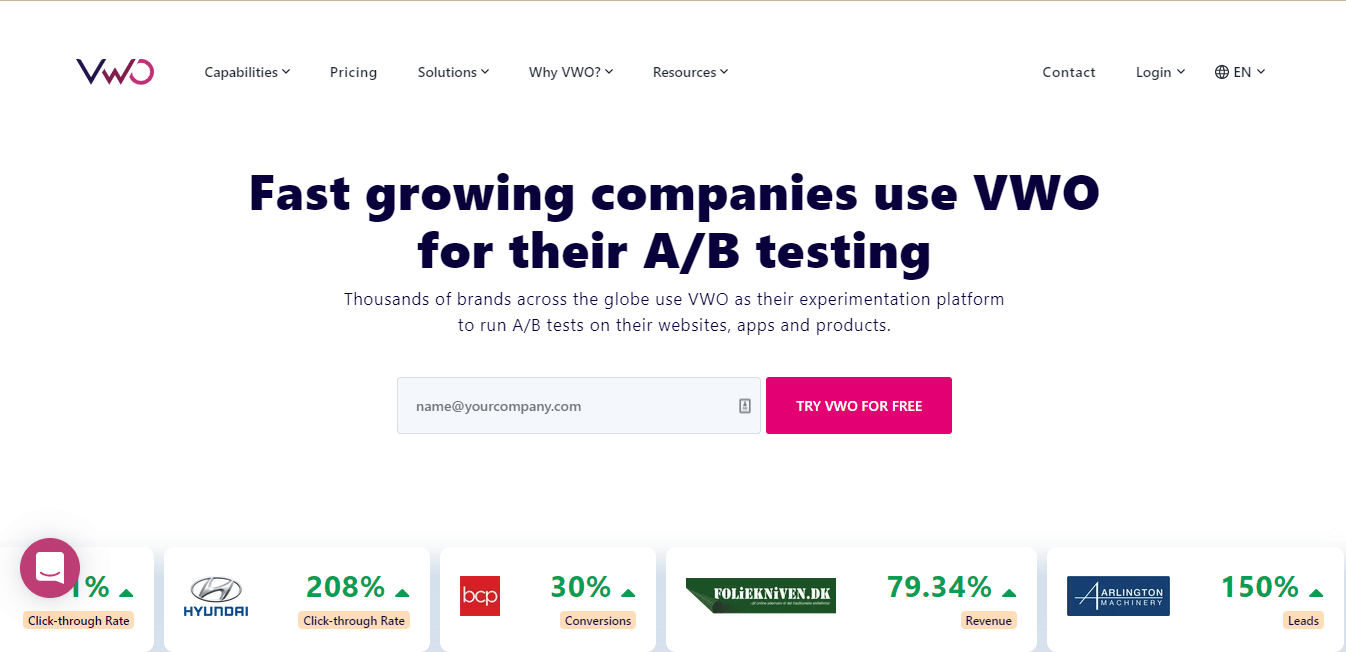
As an A/B testing platform, they’ve got their own dedicated plugin. Depending on your needs, this plugin offers a visual and code editor if you want to make changes to your variations.
VWO features revenue analysis, heatmaps to see how online visitors behave on your website, and even visitor logs.
PROS
1. Dedicated WordPress plugin.
2. It’s easy to integrate with WordPress.
3. It’s easy to set goals.
CONS
1. It’s pricey.
2. Great features only available to paid subscribers.
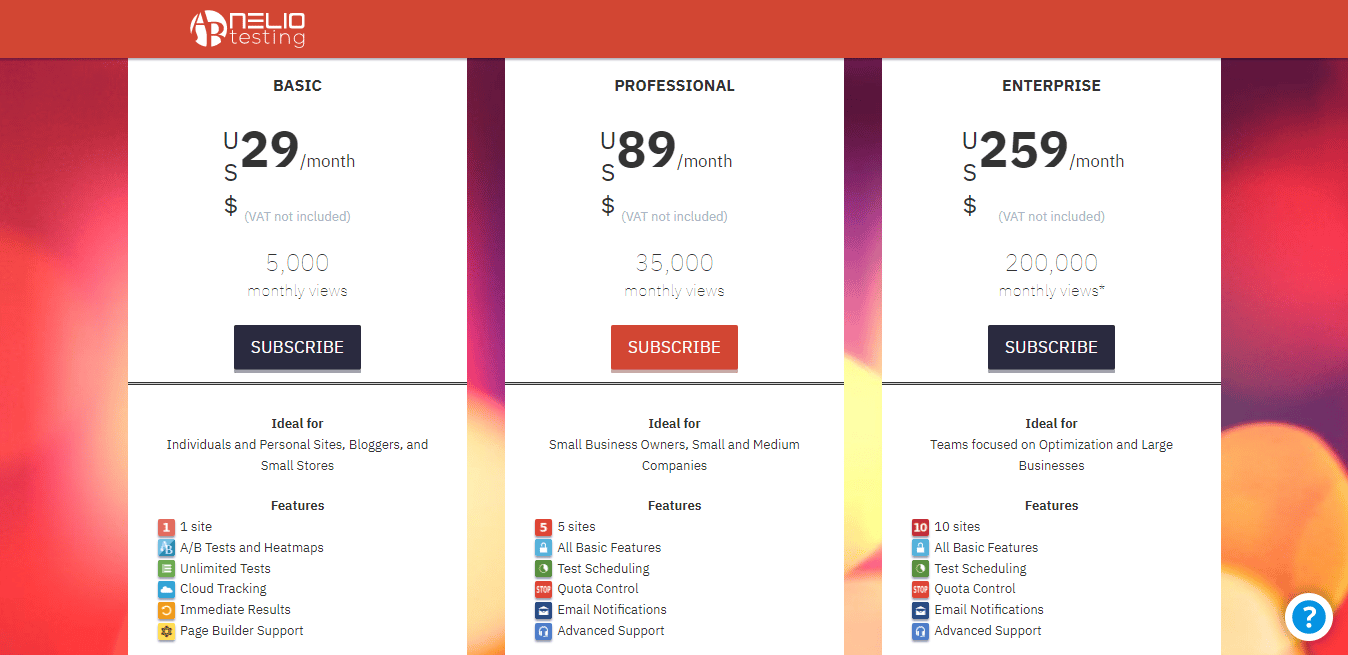
3. Nelio A/B testing:

The Nelio A/B testing plugin lets you test pages, posts, headlines, layouts, etc. It boasts powerful analytics and is SEO friendly.
When running your A/B test, Nelio lifts all the processing load from your server and takes it to their cloud, so running A/B tests doesn’t affect your site’s speed or performance.
This plugin isn’t free. It starts at $29.00 for basic.
Wrapping Up
A/B testing is a never-ending process. If you want your website to convert visitors to customers, you need to keep testing, learning from each test, documenting, and repeating the process.
Do these, and you will stay ahead of the marketing curve, and your website will be a favorite of your ideal customers.